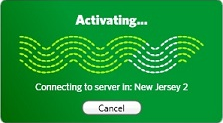
After you install PRIVATE WiFi™, you can determine when PRIVATE WiFi is loaded (when the software has started up on your computer) and when it is activated (when a connection has been established from your computer to PRIVATE WiFi’s server and data encryption has started). To learn how to manage both of these automatic controls, check out our article PRIVATE WiFi™ Quick Start Guide.
You can manually load PRIVATE WiFi if it is not set up to automatically load. On a PC or Mac, click on the PRIVATE WiFi desktop icon.
To manually load PRIVATE WiFi on a PC:
1. Click Start.
2. Click All Programs.
3. Click PRIVATE WiFi.
You can manually launch the PRIVATE WiFi application if it is not set up to automatically activate when you open a browser window. Note that PRIVATE WiFi must be loaded for it to be activated. If PRIVATE WiFi has been loaded, one of two icons will appear in your system tray:
|
|
PRIVATE WiFi has been loaded and it is currently activated and is providing PRIVATE WiFi protection. |
|
|
PRIVATE WiFi has been loaded and it is currently not activated and is not providing PRIVATE WiFi protection. |
|
|
PRIVATE WiFi has been loaded but is not needed because you are accessing a secure (WPA, WPA2, or wired) connection. |
To manually activate PRIVATE WiFi:
1. Right-click on the PRIVATE WiFi icon in your system tray.
2. Select Activate.

PRIVATE WiFi activates after a few moments. In addition, the PRIVATE WiFi icon in the system tray turns from red to green.
To deactivate PRIVATE WiFi:
1. Right-click on the PRIVATE WiFi icon in your system tray.
2. Select Deactivate. PRIVATE WiFi is deactivated.
Note: Even though PRIVATE WiFi is deactivated, it is still running in the background of your computer. The PRIVATE WiFi icon in the system tray turns from green to red, which indicates that no privacy protection is currently taking place. If you want to close PRIVATE WiFi, right-click on the system tray icon and select Quit.
